Cabin: Stain and Steps

With the weather starting to warm up a bit, I've been able to get back to working on the cabin here and there. A few weeks ago when we had that near-summer weekend, I was able to get half of the cabin exterior stained. Unfortunately, since then it hasn't been warm enough for me to stain the other two sides. I still need to install soffits and a door to get it all sealed up before I can start the interior. But in the meantime, with the weather too cold for stain, I've started putting in some rock steps leading up to the cabin. What do you think?

Raise the Roof!

Over the holiday break, I managed to get Carter's loft bed finished and set up in her room. It worked out great! It's high, but she can still sit up just fine. And her room is so tiny, that it made a huge impact in her available space. I think we almost doubled her play area by getting her bed up off of the floor. Both kids were most impressed with the fact that they could touch the ceiling now, without my having to lift them up. Sean's bed is about halfway done, and I should get it finished within the next couple of weeks. The beds are both built with just framing lumber, so they only cost me about $50-75 per bed in materials. They're finished with a whitewash finish, with two coats of polyurethane over the top. That whitewash finish should help hide the wear and tear on the bed much better, and is really easy to touch up.

Cabin – Roof Complete

Last weekend I finished the roof on the cabin. Yay! I'm finally done spending all my time on the verge of falling off of the roof (or at least -feeling- like I was going to). Next up is the siding, although I don't relish trying to put that up in the near-hurricane we are expecting this weekend, so I might have to hold off another week on that step.

Cabin – Roof

It's been a while since I've posted an update on the cabin, and a lot of work has been completed since then. It's all framed, and the roof is sheathed. This past weekend, I got the roof papered, and got the drip edge installed. This coming weekend, I'm hoping to get the shingles up. Once I do that, the roof will be totally complete. Which would be great - I'm getting tired of working up so high. When working near the ridge of the roof, I'm sometimes stand on a board that is 15 feet off of the ground.

Cabin – Plans

These images should give you an idea of my plans for the cabin I'm building. I used Sketch-Up to design the cabin over the winter, and have been building it from these plans. Sketch-Up was pretty cool to use for this. I could lay out all of the framing, and experimenting with where the windows and door would go - all without cutting a single piece of wood. Now, while building, I can take measurements directly from the model, and it's made estimating the amount of materials I'll need very straightforward. All the windows are ones that I salvaged last year from other peoples' remodeling projects. You can see in the third image what my plan is for the inside. There will be a lofted bed platform, and a window seat under it that will be wide enough to sleep on. There will be storage under the window seat, and I'm also going to try and put a reading chair in there, and a bookcase.

Cabin – Foundation

For those who didn't know, I've been building a cabin in the woods. I'm further behind with pictures than I am with actual progress, but I'll try to get caught up over the next couple of weeks - so these pictures are from a month or so ago. But so far I've cleared the site, and build the foundation. Once the floor sheathing was put on, the kids wanted to play up there, and it broke out into an impromtu dance party!

Special Wall

A few weeks ago, I read on the 
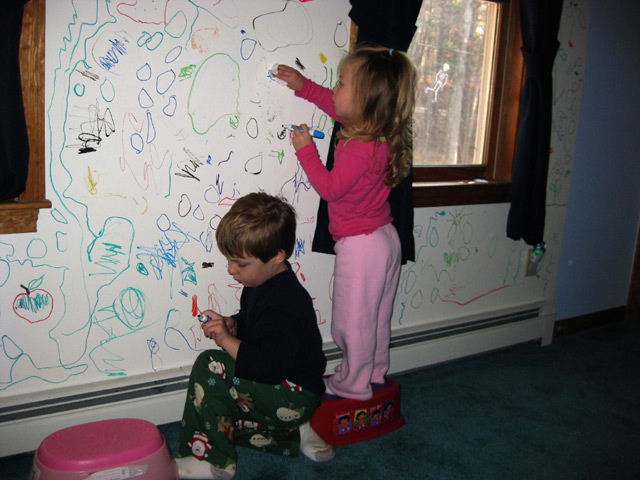
Make Magazine blog about a certain paint that you could paint on the wall to turn the whole wall into a white board. I had been planning to paint Sean's room soon anyway, and this seemed like a great idea. He loves to draw so much. When I first told him about this paint, and that he would be able to draw on his wall with special markers, and then erase it and draw new things - he just stared at me silently in disbelief, his eyes getting wider and wider as I went on. When I finished, he just let out a breathless "...thank you...!" Well, I put up the paint about a week and half ago, and last Sunday was the first day that it was finally cured enough to try it out. Here are a couple of pics from our first day with Sean's "special wall".