Metal Lathe

One other great thing about the new house is a small finished room in the basement with a concrete floor, which I can use as a metal-working shop. I've wanted to get into machining for a while, but didn't have the space in the old shop to add any more tools - plus mixing a metal shop with a wood shop is a recipe for a fire once I start grinding or welding. So now this little room has a brand new Grizzly mini-lathe! I'm hoping to learn a lot about it, and maybe add a small benchtop mill to this room in the future. I'll bet this little lathe will be the source of many new project posts in the near future.

New Workshop

I know these photos aren't going to look much different than the old workshop, but it really does feel different in person. Because the new house has sort of a third garage bay (it's not car-depth), I no longer need to share my woodshop space with bikes, generators, snowblowers, etc. It lets me spread my tools out a lot more, and makes the shop a lot more fun to work in. Plus a little natural light coming in through the man-door between the garage doors is a great bonus.

We Moved!

It's been pretty quiet here on the blog, but I've got a good excuse - we moved! It's only a couple of miles from the old house - we wanted to keep the kids in the same schools. But it gives us more space, plus a neighborhood that we can actually walk around - and the kids have friends in this neighborhood too, which is a big plus. Here are a couple teaser pics of the new place.

Ruobo Workbench – Finished

Finished the workbench today. I flattened the top, drilled the dog holes, and put on two coats of a tung oil finish. Both vises are installed and working, and I made some bench dogs to use with the dog holes I drilled in the top. I also found some handmade iron holdfasts on etsy. I still don't know what I want to do underneath it, but for now I am calling it done!

Ruobo Workbench

I've started working on a traditional, Ruobo-style workbench. It's made completely of red oak, and weighs over 300 pounds - it's a beast! The top is over three inches thick, and the legs are about four inches square. The bottle of sarsaparilla is there for scale. It's got a traditional leg vise, and a full width end vise. I still need to install the end vise, flatten the top, drill the dog holes, and apply a finish to the whole bench. I may install a shelf or some drawers underneath, but I'd like to use it for a while first and figure out what would be the most useful. I'll post another set of photos once it is done.

Pin Wall Update

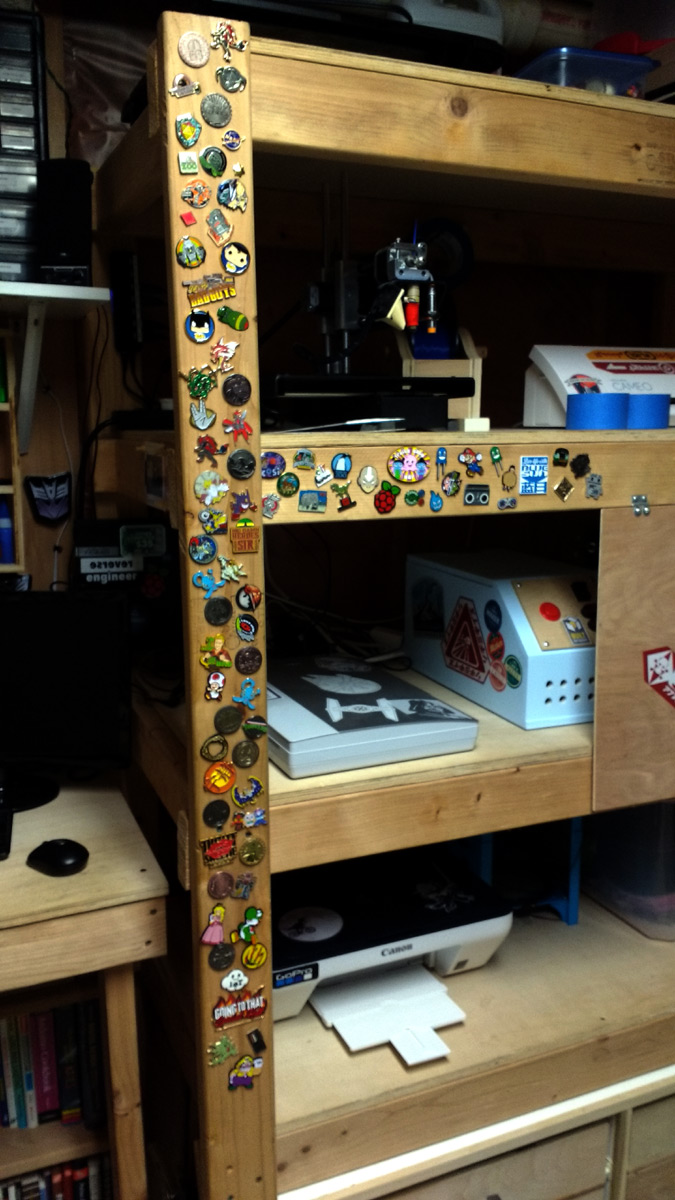
Back in August of 2016 I posted about all of the pins the kids and I had collected, and how we were sticking them into the wood of the shelves near my electronics workbench. At the time we probably had about 30 or so. We figured it was time to post an update - there has to easily be over 80 there now.

Shelves For My Toys

Another project I've forgotten to post - I made these shelves in the spring, to hold the growing collection of toys that keep showing up in the Loot Crates. My favorites are the larger Firefly figures on the middle shelf of the largest unit. The box all the way to the left is my new solution for organizing my wire spools - so far it's been working out great.

Root Beer Sampling – Update

I've continued tasting any bottled root beer I can find locally, and have expanded the brands I've sampled from 12 (in the last post) to about 20 now. Although I think my favorite is still the Bulldog. I need to find some new grocery stores in the area - I've tapped out the varieties available in all my usual (and some not so usual) stores.

Hand Sander

Borrowed an idea I saw in a YouTube video - basically, when the hook-and-loop pad on my random orbit sander wore out, I replaced it and screwed the old one to a nice piece of cherry to made a hand sander. The hook-and-loop still has enough grab to hold the sheets when hand sanding - plus it is nice and comfortable to hold. Although I probably need to add a strap across the back to make it easier to hang on to.

Bartop Arcade

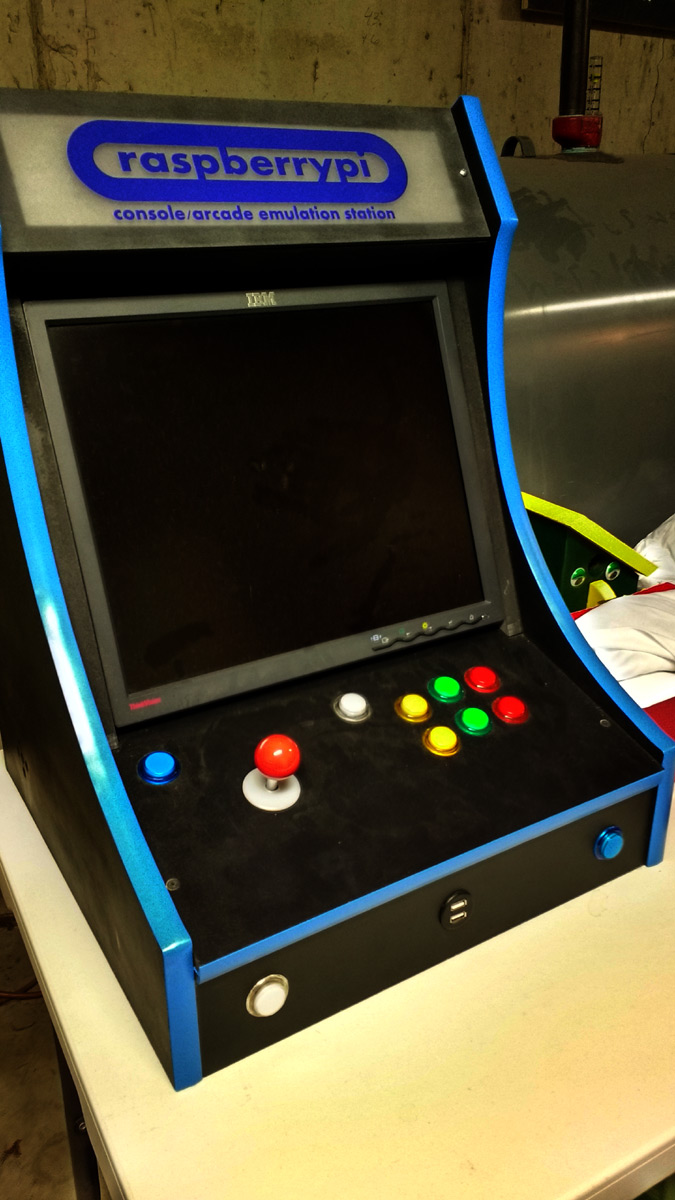
I'm convinced that I've posted about this project before, but I can't seem to find it on the blog no matter how I search. Back when I made it, it was sort of a rush job to finish it before a party - so I guess I must have forgotten to post it. Anyway, here is a bartop Raspberry Pi arcade machine I built a year or so ago. The best part? It's got a pair of USB jacks on the front that can be used to plug in some USB SNES controller I've got, or you can also insert a memory stick to install new games to the system.